


Making cheese at home begins with an ordinary ingredient and a rather extraordinary transformation. A pan of milk becomes soft curds, the curds become cheese, and something that once looked completely familiar starts developing a texture, flavour and character of its own.
That transformation explains much of the hobby’s appeal. Cheese making feels practical, creative and just scientific enough to remain fascinating. You follow a process, yet no two batches feel exactly alike. The milk, temperature, timing and handling all influence what eventually reaches the table.
Some cheeses can be eaten on the same day. Others ask for patience, careful storage and the occasional nervous inspection while they mature. Therefore, beginners can choose between immediate satisfaction and the long anticipation of opening a cheese that has spent weeks or months quietly developing.
Most importantly, making cheese at home does not require a farmhouse, a dairy herd or a mysterious stone cellar. A clean kitchen, accurate thermometer and willingness to follow instructions carefully can take you surprisingly far.
Quick Answer: Is Making Cheese at Home Difficult?
Making cheese at home can be simple or highly technical, depending on the cheese you choose. Fresh cheeses such as paneer, ricotta-style cheese and soft curd cheese can often be made with ordinary kitchen equipment. Mozzarella and halloumi introduce more technique, while matured cheeses require cultures, moulds, pressing and controlled storage.
Beginners achieve the best results by starting with a forgiving fresh cheese rather than attempting a traditional cheddar immediately. Once you understand how milk separates into curds and whey, the more advanced stages begin to feel far less mysterious.
Why Cheese Making Feels Different From Ordinary Cooking
Most cooking provides an answer within an hour. You chop, mix, heat and serve. Cheese making works at a different pace.
Even a quick cheese asks you to observe subtle changes. The milk thickens. A clean break appears in the curd. Whey begins collecting around the edges. The curds become firmer as they are cut, stirred or drained.
Consequently, the hobby encourages attention rather than speed. You cannot rush milk into becoming cheese simply because dinner is approaching. Temperature matters, timing matters and gentle handling often matters more than enthusiasm.
That slower rhythm can feel wonderfully absorbing. Phones tend to stay forgotten while you watch a pan, test a curd or tie a muslin cloth over the sink. In that sense, making cheese at home belongs naturally among the low-stress hobbies for adults that replace constant digital stimulation with a practical task you can see, touch and eventually taste.

Nevertheless, calm does not mean careless. Cheese making rewards precision, particularly around hygiene and temperature. Fortunately, that precision soon becomes part of the pleasure rather than an inconvenience.
“Few hobbies reward patience quite like cheese making. Every successful batch proves that some of the best things simply cannot be hurried.”— HobbyIdeas.co.uk
What Actually Happens When Milk Becomes Cheese?
At its simplest, cheese making separates milk into solid curds and liquid whey.
Acid, bacteria, rennet or a combination of these causes the milk proteins to join together. The solid portion traps fat and moisture, forming curds, while the remaining liquid becomes whey.
From that point, the process can travel in many directions. Large, gently handled curds usually retain more moisture and produce a softer cheese. Smaller curds release more whey and can develop into firmer styles. Salting adds flavour while also influencing moisture and preservation.
Some cheeses finish after draining. Others are shaped, pressed, brined, coated or matured. During ageing, cultures and enzymes continue changing the cheese from within. Texture becomes firmer or creamier, flavours deepen, and the mild curd you made in the kitchen gradually becomes something far more distinctive.
You do not need to understand every part of the chemistry before beginning. However, knowing that each stage has a purpose makes the instructions easier to follow and mistakes easier to diagnose.
Why Milk Choice Matters
Milk forms almost the entire character of a cheese, so quality matters. Most beginners should start with fresh pasteurised whole milk rather than long-life milk.
Ultra-high-temperature processing can alter the proteins in ways that make reliable curd formation more difficult. Standard pasteurised milk usually provides a much more dependable starting point and is widely available.
Fat content also affects richness and yield. Whole milk generally produces a fuller cheese, while reduced-fat milk can create a firmer or less satisfying result depending on the recipe.
Raw milk attracts experienced cheese makers because of its natural microbial character. However, it also introduces additional food-safety considerations. Cheese made from unpasteurised milk has been associated with foodborne illness, so beginners should use pasteurised milk and follow a trusted recipe rather than experimenting casually with raw dairy.
Once you can make consistent cheese safely, you can begin exploring how different milks influence flavour. Goat’s milk, for example, behaves differently from cow’s milk, while sheep’s milk produces exceptionally rich cheese but can prove harder to source.
Essential Equipment for Making Cheese at Home
Stainless-Steel Pan
A heavy, non-reactive stainless-steel pan heats milk evenly, prevents scorching and provides enough space for curds to develop without overflowing. It is durable, easy to clean and ideal for repeated use.
Accurate Thermometer
Temperature controls almost every stage of cheese making. A reliable digital thermometer removes guesswork and helps cultures, rennet and curds behave exactly as they should.
Knife & Slotted Spoon
A long knife cuts curds evenly throughout the pan, while a slotted spoon allows you to stir, lift and transfer delicate curds gently without breaking them apart.
Cheesecloth or Butter Muslin
Fine cheesecloth or butter muslin separates curds from whey while allowing moisture to drain naturally. It quickly becomes one of the most frequently used items in any cheese maker’s kitchen.
Cheese Moulds
Cheese moulds give soft and semi-hard cheeses their shape while encouraging even drainage. They become increasingly useful as you progress from fresh cheeses to more traditional varieties.
Cheese Press
A cheese press applies steady, even pressure to remove excess whey and create a firm texture. Beginners can improvise with simple weights before deciding whether to invest in a dedicated press.
If you would like to explore some of the equipment featured in this guide, we’ve also created a curated Cheese Making Essentials collection. Rather than overwhelming you with hundreds of products, we’ve selected reliable beginner kits, traditional presses, thermometers, moulds and other equipment that we believe offers a great starting point for anyone discovering the rewarding hobby of making cheese at home.
Four Good Cheeses for Beginners
Paneer: The Confidence Builder
Paneer offers one of the simplest introductions to making cheese at home. Warm milk is separated with an acid such as lemon juice or vinegar, then drained and pressed.
Because it does not require rennet, cultures or ageing, paneer lets you watch the basic transformation without becoming overwhelmed by specialist ingredients. It can then be sliced, fried or added to curries.
Soft Cheese: The Quick Reward
A soft fresh cheese provides almost immediate satisfaction. Once drained and lightly salted, it can be flavoured with herbs, pepper, garlic or other additions.
This style also teaches an important lesson: draining time changes texture. A short drain creates something loose and spreadable, while a longer drain produces a firmer cheese that holds its shape.
Mozzarella: The Hands-On Challenge
Mozzarella introduces the memorable stage of stretching warm curds. When everything works, the curd changes from a soft mass into a smooth, elastic cheese.
However, mozzarella can be temperamental. Milk treatment, acidity and temperature all influence whether the curd stretches properly. Therefore, treat the first attempt as an experiment rather than a final examination.
Halloumi: The Satisfying Next Step Of Making Cheese At Home
Halloumi feels more involved than a simple acid-set cheese, yet it remains relatively forgiving. The curds are cooked, shaped and often folded, creating a firm cheese that can be grilled or fried.
It also introduces beginners to rennet, curd cutting and whey heating without requiring months of maturation. As a result, it makes an excellent bridge between fresh cheeses and more ambitious projects.
Ad – HOBBY IDEAS | FEATURED STARTER KIT
Start Making Your Own Cheese with an All-in-One Kit
There’s something wonderfully satisfying about turning a few everyday ingredients into cheese you’ve made yourself. However, finding the right equipment and ingredients can feel rather daunting when you’re just starting out.
That’s where The Ultimate Cheese Making Kit comes in. Designed for beginners and enthusiastic home cooks, it brings together the specialist ingredients, equipment and recipes needed to explore ten different varieties of homemade cheese.
Ten Cheeses to Discover
From creamy mascarpone and ricotta to mozzarella, paneer, Scottish Crowdie and Greek-style cheese, the kit offers plenty of opportunities to experiment. You can explore different textures, flavours and techniques while developing your confidence in the kitchen.
What’s Included?
The kit includes a recipe booklet, vegetarian rennet, citric acid, organic sea salt, butter muslin, herbs and spices, three cheese moulds and a thermometer.
According to the manufacturer, the supplied ingredients can make up to 40 batches across 10 different cheese varieties, making this an appealing introduction to a hobby that rewards patience, curiosity and a little experimentation. You’ll also need to supply fresh milk and follow the individual recipes.
A Creative Gift for Food Lovers
Cheese making is an enjoyable activity to try at home, whether you’re discovering a new kitchen hobby or looking for something different to give a keen cook. Better still, there’s the satisfaction of sharing something you’ve made yourself.

Check Out The Kit – Explore The Ultimate Cheese Making Kit on Amazon →
The First Batch Is About Learning, Not Perfection
Homemade cheese can look wonderfully rustic when photographed on a wooden board beside a sprig of rosemary. The actual first batch may resemble a damp white cushion with uncertain ambitions.
That is perfectly normal.
Your first cheese teaches you how quickly milk warms, how curds feel beneath a knife and how much whey continues escaping long after you thought draining had finished. These practical details make far more sense once you have experienced them.
Texture may not match the photograph in the recipe. Flavour may seem milder than expected. The curds might break into uneven pieces despite your careful cutting.
Nevertheless, even an imperfect cheese can teach you where the process changed. Perhaps the temperature climbed too quickly, the curds were stirred too vigorously or the cheese needed longer to drain.
Record what happened rather than relying on memory. A small notebook containing quantities, temperatures, timings and observations soon becomes more valuable than another piece of equipment.
“The first cheese you make may not be perfect. The first one you proudly serve to somebody else is the one you will always remember.”— HobbyIdeas.co.uk
Food Safety Must Come Before Experimentation
Cheese making involves warm milk, moisture and microorganisms, so hygiene deserves serious attention. Clean worktops, thoroughly washed equipment and careful handwashing should become automatic before every batch.
Use milk within its date, follow the recipe closely and refrigerate fresh cheeses promptly. The Food Standards Agency advises keeping domestic fridges at 5°C or below because correct chilling helps slow the growth of harmful bacteria. Its food chilling guidance provides practical advice for storing perishable food safely.
Fresh homemade cheese does not contain the same preservatives or protective packaging as many commercial products. Therefore, label each batch with the date, store it correctly and discard it if appearance, smell or texture suggests spoilage.
Do not assume that all mould is harmless simply because some famous cheeses contain it deliberately. Cultivated moulds belong to controlled recipes. Unexpected growth on an unplanned cheese deserves caution rather than optimism.
Pregnant people, young children, older adults and anyone with a weakened immune system should take particular care around unpasteurised dairy products and soft cheeses. When making cheese for other people, always explain how it was produced and stored.
Making Cheese at Home Without Turning the Kitchen Upside Down
Cheese making looks more intimidating when every specialist tool is laid across the worktop at once. In reality, good organisation keeps the process surprisingly manageable.
Read the entire recipe before heating the milk. Measure cultures, salt and rennet in advance. Arrange clean cloths and draining equipment before the curds appear. That preparation prevents hurried searching at the exact moment when timing matters.
It also helps to begin with a small batch. Four litres of milk feels far more manageable than an enormous pan, particularly when you are learning how to cut and drain curds.
Expect whey. Considerable amounts can remain after making even a modest cheese. Place bowls carefully and make sure cloths are secure before pouring.
Whey does not always need to go down the sink. Depending on the recipe and how it has been handled, it may be useful in bread, pancakes, soups or other cooking. However, store it promptly and treat it as a perishable dairy product.
The Pleasure of Developing Your Own Cheese
Once you can repeat a basic recipe reliably, the hobby becomes far more creative.
You might adjust draining time to alter texture, experiment with herbs or change the amount of salt. Chives, parsley and other home-grown herbs can give fresh cheese a particularly personal character. Readers who enjoy the idea of growing their own ingredients may also appreciate our guide to hobby ideas UK readers can try, which includes gardening and other practical interests that complement kitchen hobbies beautifully.
However, change one thing at a time. If you alter the milk, culture, salt, temperature and draining period simultaneously, you will never know which adjustment caused the result.
That experimental side makes cheese making addictive. A good batch inspires another question. Could it become firmer? Would a different culture produce more flavour? What happens after an extra week of ageing?
Before long, the kitchen hobby develops its own language of curds, cultures, rennet, brine and affinage. Friends may begin regretting casual questions about how your latest cheese was made.
What Matured Cheese Adds to the Hobby
Fresh cheese teaches technique, but maturation introduces anticipation.
A young cheese may need turning, brushing or regular inspection. Conditions must remain stable, yet the cheese should not be forgotten. This creates a gentle routine that extends the hobby beyond the original making day.
Maturation also tests patience. Opening a cheese too early reveals something unfinished. Leaving it longer gives texture and flavour time to develop, although waiting can become remarkably difficult once curiosity takes over.
Harder cheeses require more control over humidity and temperature than most beginners realise. A warm kitchen cupboard is not a substitute for a suitable ageing environment. Therefore, progress gradually and learn the storage requirements before committing several litres of milk to a long-term project.
A simple maturation box inside a suitable fridge can work for certain small cheeses, provided the recipe specifically allows it and conditions are monitored. Serious enthusiasts sometimes move on to dedicated cheese fridges, presses and ageing spaces, but none of that is necessary for the first few batches.
However, as your confidence grows, you may find yourself moving beyond fresh cheeses and experimenting with traditional hard varieties that require consistent pressing. At that stage, specialist equipment begins to make a noticeable difference. A Dutch Wooden Cheese Press provides controlled pressure of up to 200 lbs and includes two 1.2-litre cheese moulds, making it suitable for everything from weekend hobby projects to more ambitious home cheese making. Its traditional lever design allows pressure to be applied gradually and consistently, helping produce firmer cheeses with an even texture while adding an authentic touch to the cheese-making process.
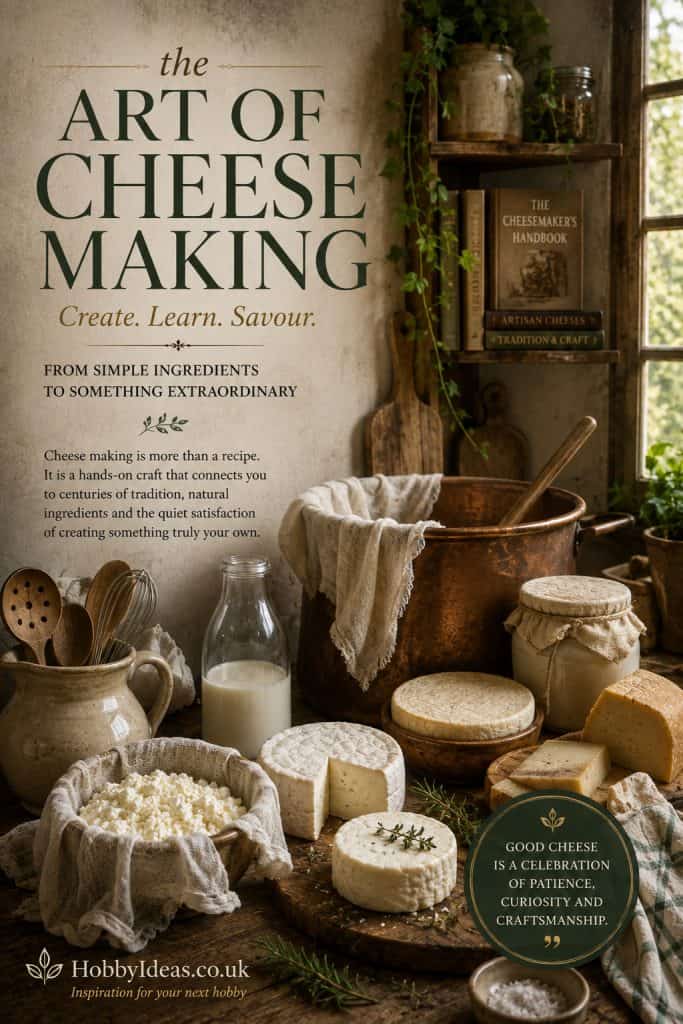
Is Making Cheese at Home Expensive?
The first fresh cheese can cost little beyond milk, acid, salt and a draining cloth. However, expenses increase when you add cultures, rennet, moulds, presses and controlled ageing equipment.
That does not mean the hobby needs to become expensive immediately. Buy equipment as your skills grow. A beginner who discovers they love paneer and soft cheese may never need a press, while somebody fascinated by cheddar will eventually find one indispensable.
Homemade cheese is not always cheaper than supermarket cheese, especially when milk prices and small yields are considered. Cost-saving rarely provides the strongest reason to begin.
The value lies elsewhere. You understand the process, control the ingredients and experience the satisfaction of serving something that began as milk in your own kitchen.
Common Beginner Mistakes When Making Cheese at Home
Heating the Milk Too Quickly
Gentle, even heating gives you far more control. Rapid temperature changes can affect curd formation and make consistent results much harder to achieve.
Guessing Measurements
Small amounts of rennet, culture and salt have a significant effect on the finished cheese. Accurate measuring tools are far more reliable than estimating by eye.
Handling Curds Too Roughly
Curds are surprisingly delicate. Stir gently and follow the recipe carefully to avoid breaking them into tiny fragments and losing valuable moisture.
Ignoring Hygiene
Cheese making depends on cleanliness. Thoroughly wash and sanitise equipment before every batch, and keep finished curds away from anything that could contaminate them.
Starting Too Ambitiously
Complex matured cheeses look tempting, but they introduce many extra stages. Fresh cheeses build confidence and teach the essential skills first.
Skipping Notes
Record temperatures, timings and observations after every batch. Those notes soon become one of your most valuable resources as you refine your technique.
Ready to Make Your First Cheese?
Every experienced cheese maker started with a single saucepan of milk and a little curiosity. Your first attempt does not need to become an award-winning cheddar or a perfectly matured camembert. Instead, it simply needs to teach you how milk becomes curds, how curds become cheese and why the process has fascinated people for thousands of years.
Choose one straightforward recipe, gather your equipment and allow yourself enough uninterrupted time to enjoy the experience. Work carefully, keep everything clean and remember that every batch teaches something new. Before long, you’ll begin recognising subtle changes in texture, temperature and flavour that once seemed impossible to notice.
Most importantly, enjoy the journey. Cheese making is one of those rare hobbies where patience, practice and curiosity are rewarded with something you can proudly share around the table. Once you’ve tasted your own homemade cheese, you’ll never quite look at an ordinary block from the supermarket in the same way again.
Frequently Asked Questions About Making Cheese at Home
What is the easiest cheese to make at home?
Paneer and simple soft cheeses are among the easiest choices because they require very little specialist equipment and can be eaten without maturation. They teach the essential process of separating curds from whey before you move on to cultures and rennet.
Can I make cheese in a normal kitchen?
Yes. Many fresh and beginner cheeses work well in an ordinary domestic kitchen. You need clean equipment, accurate temperature control and enough workspace to drain and shape the curds safely.
Do I need a cheese press?
Not for every cheese. Paneer can be pressed beneath a weighted plate, while many soft cheeses drain under their own weight. A proper press becomes more useful when making firmer matured cheeses that require consistent pressure.
How long does homemade cheese last?
Storage life depends on the recipe, moisture content, salt level and handling. Fresh cheeses generally have a short refrigerated life, while properly made and matured cheeses can last much longer. Always follow the storage instructions supplied with the recipe.
Can I use supermarket milk for making cheese?
Yes. Fresh pasteurised whole milk works for many beginner recipes. Avoid long-life or ultra-high-temperature milk unless the recipe specifically states that it is suitable, because the heat treatment can make curd formation less reliable.
Is making cheese at home worth it?
It is worth trying for anyone who enjoys practical kitchen projects, food history, gradual learning and creating something from basic ingredients. The reward comes from understanding the transformation as much as eating the finished cheese.
Final Thoughts on Making Cheese at Home
Making cheese at home turns an everyday food into a fascinating practical hobby. It combines patience, observation, science and creativity without requiring a professional kitchen or years of training.
Your first batch may be slightly uneven. The curds may not behave exactly as expected, and the kitchen may contain more whey than seemed remotely possible. Nevertheless, the moment you slice, fry or spread a cheese you made yourself changes the way you look at milk forever.
Start simply, work cleanly and allow each batch to teach you something. Once the basic transformation makes sense, a whole world of soft cheeses, stretched curds, brined varieties and matured wheels begins to open.
Then comes the real danger: discovering that the spare fridge would make an excellent little cheese cave.
Affiliate Disclosure: HobbyIdeas.co.uk participates in the Amazon Associates Programme. This means we may earn a small commission if you purchase through selected links, at no extra cost to you. We only feature products and resources that genuinely support the hobbies we write about and believe they may be useful to our readers.
Looking for more inspiration? Visit our curated Hobby Ideas Amazon Storefront, where you’ll find carefully selected books, beginner kits, tools and equipment for a wide range of hobbies, including cheese making.